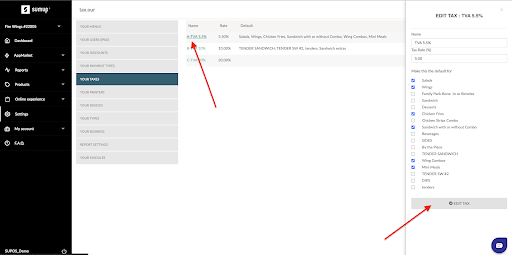
How to add taxes into your POS
Enter your back office > settings > Your taxes
Step 1: Press new Tax. Enter name of tax (e.g. Sugar Tax)


Step 2: Add local tax rate and add which product you would like to default this tax

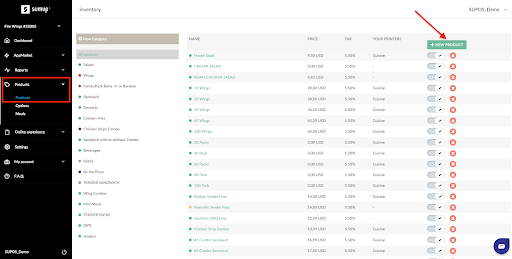
How to create, edit, delete and deactivate a product
To create, modify, deactivate or delete any product in your list, first navigate to Settings > Back Office. Select Products and click Products again from the dropdown menu.
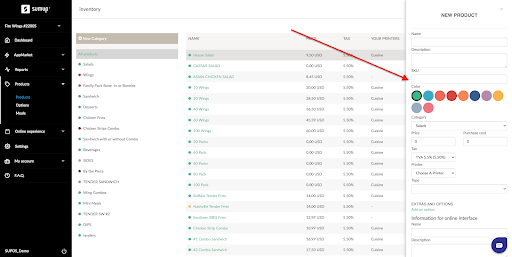
Create a Product: Step One
To create a new product, click the green New Product button.

Create a Product: Step Two
You will then see a new, blank product sheet. Fill in the name of the product, select a color, and enter the price. This information is required to create a new product, but you can enter additional information about the product at any time.

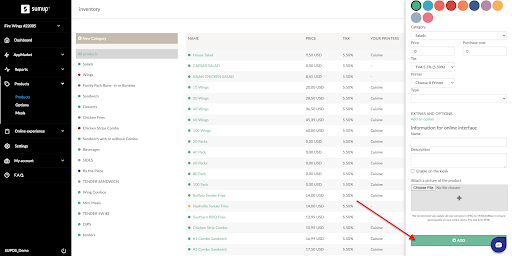
Create a Product: Step Three
You can also add a custom ID (or SKU) to your product. The SKU is primarily used by businesses that need to manage their product catalog in an external application—typically for stock management or e-commerce.
SKUs are an optional field for a product, but if you would like to take advantage of this feature, keep in mind that:
The SKU must be unique within a store catalog. (If an already existing SKU is added or edited on a product, it won't be saved.)
The SKU must be less than 65 characters. If an SKU longer than 64 characters is added or edited on a product, it won't be saved.

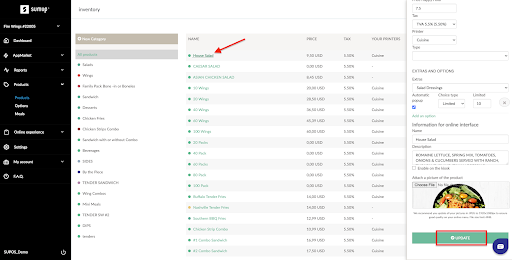
Edit a Product
To edit a product, click on the product name. The corresponding product sheet and details will open. You can then change any details and save the changes by clicking Edit.

Delete a Product
To delete a product, click the red X button to the right of the product line. Click Confirm to save the change.


Deactivate a Product
To deactivate a product, swipe the white checkmark ✔ to the left of the red delete X mentioned in the previous section. Once the product is deactivated, the line will turn red and the item will no longer appear on the app.
To reactivate the product, press the white checkmark ✔ again and the product line will turn white again.

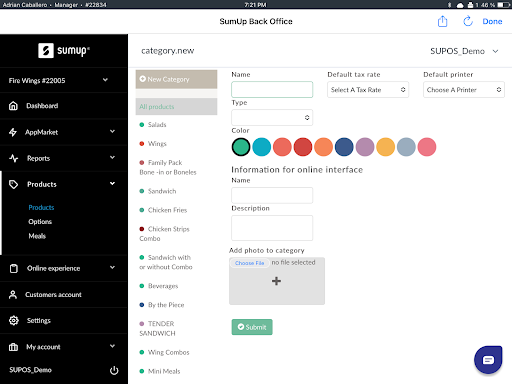
How to add categories to your product catalog
To add a new category to your product catalog, navigate to your Back Office online at new.tillersystems.com or through your SumUp POS App.
Once you’re in the Back Office, click on the Products dropdown, and then on Products. Next, click New Category. Enter the new category’s information then click Submit to update your changes.

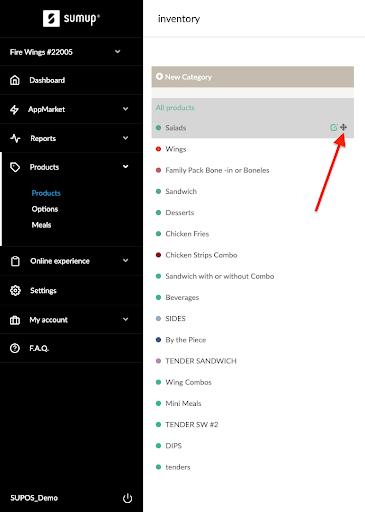
How to change the order of a category in the product list
Please note that you’ll only be able to make these modifications from a computer, not the POS iPad screen.
Moving Items across the menu
Step One
Navigate to Settings > Back Office > Products > Then click Products again from the dropdown menu.
Step Two
Once you’re in the category list, pass your cursor over the name of the product. To the right of each category name is a black arrow icon. When you click on the icon, you’ll be able to move the category up or down in the list. The same steps can be completed at the product or option level.

How to add, edit and delete an option
Create a New Option: Step One
First, navigate to Settings > Back Office > Products > Options. Before adding a new option, you’ll need to create an Option Category by clicking New Category.
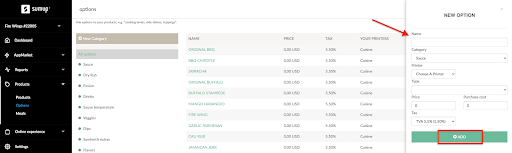
Create a New Option: Step Two

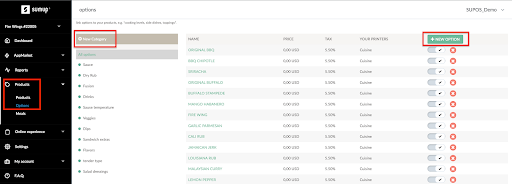
Once the category is created, click New Option. Enter the option name, category, and price.

To assign an option to a product, go to the Products tab then select Product from the dropdown list. In the product file, add the Option Category you just created and click Edit to save the changes.
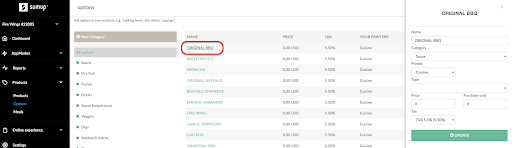
Edit an Option
To edit an option, simply click on the product name and the Option Sheet will appear.

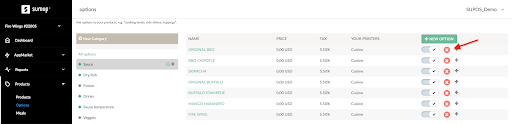
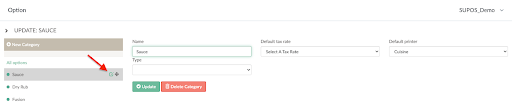
Delete an Option
To delete a single option, click on the red X symbol to the right of the option name. To delete an Option Category, click on the green modify icon (to the left of the black arrow icon) and then click Delete Category.


How to activate an option on a product
Step One
Once you've created the Option Category, navigate to Settings > Back Office > Products (tab) > Products (dropdown).
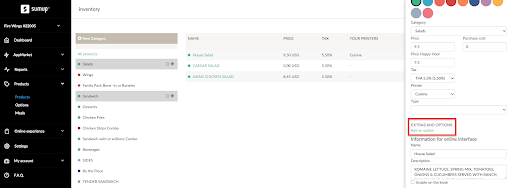
Step Two
Click on the desired product then scroll down to the bottom of the pop-up window on the right-hand side of the screen. Under the Extra and Option tab, click Add an option. You’ll then be able to choose the category and set it for that product.

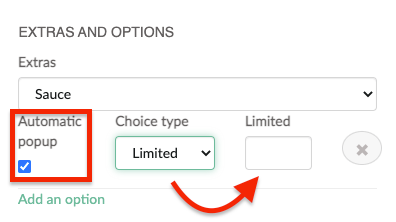
Automatic pop-ups
Check the automatic pop-up window, so that anytime you’re taking an order, the options would appear.
Keep in mind that if you choose Limited Options for a product, you’ll need to enter the maximum number of choices possible. Refresh your app to see the updated changes.

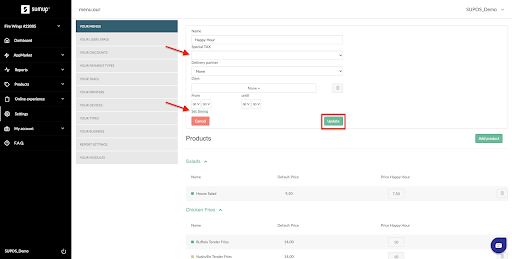
How to create and customize a new menu
Once you’ve introduced your products in your Back Office in the Products tab, you have the ability to customize and create new menus. For example, a special menu for the weekends, for takeaway, etc.
Step One
Click on New Menu and fill in the information needed: the name, any special schedule requirements, and taxes. Then click Add to save the changes.
Step Two
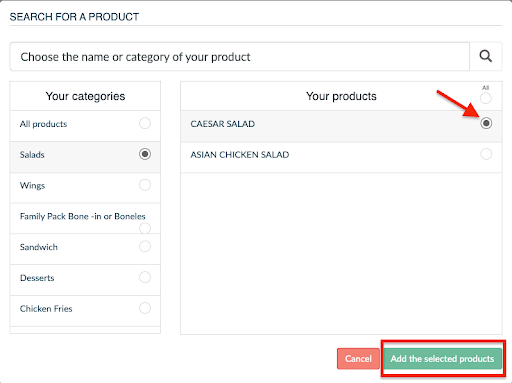
Then, you have to add the product to your menu by tapping on "Add Product".

Step Three
Now, select your products then click Add the Selected Products.

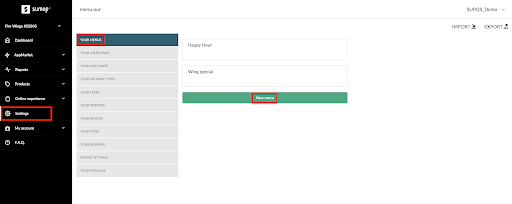
How to edit a menu
After you’ve created your menus in the Back Office, you can custom and modify them. Navigate to the menu you want to edit by going to Settings > Your menus. Then, click the gray Edit button to modify the name, schedule, and tax.